#USB MIDI controller
Explore tagged Tumblr posts
Visit Tumblr Blog
Explore Tumblr blogs with no restrictions, modern design and the best experience.
Last Seen Tumblr Blogs


Fun Fact
25% of US internet users with an annual income of $80-100K use Tumblr.
Text
Top 10 Essentielle Gadgets für jeden DJ
[vc_row][vc_column][vc_column_text]Gadgets für jeden DJ – Als DJ braucht man nicht nur ein gutes Gefühl für Musik und Publikum, sondern auch die richtige Ausrüstung, um die Menge zum Tanzen zu bringen. Egal, ob du ein aufstrebender DJ oder ein erfahrener Profi bist, diese Top 10 essentiellen Gadgets werden dir helfen, deine Performance auf das nächste Level zu heben. 1. DJ Controller Ein DJ…

View On WordPress
#089DJ Booking München#2024#DJ Equipment#DJ Gadgets#DJ Kopfhörer#DJ Plattenspieler#DJ Transporttaschen#DJ-Controller#DJ-Mikrofon#DJ-Software#externe Festplatte#Laptop für DJs#MIDI-Controller#Monitor-Lautsprecher#München#Musikbibliothek#professionelle Kopfhörer#Professioneller DJ Service#USB Hub
0 notes
Text


SevenMileMountain - MIDI Pitch Bend and Modulation Wheels
"A dedicated Pitch Bend / Modulation controller with traditional wheels. This unit connects via USB to your MIDI devices, allowing you to add Pitch Bend to synths which lack them.
The wheels are about the same width as a full sized piano key (just shy of 1"). The left wheel, Pitch Bend, is spring loaded, so it returns to center when released. The right wheel, Modulation, does not automatically return to center. Both have their center points marked with a raised tab.
The wheels are enclosed in a cube 2.5" square (65 mm) and will appear as "Seeed XIAO M0" in your DAW. As it's programmed specifically as PB/MD, no other setup should be required.
As of August 30, 2024:
More Colors: I'm back to making both black and white versions of the wheel.
New Firmware: Better handling of PB deadzone and ranging. All prior purchases can be updated at no cost.
As of April 12, 2024:
Now available in All Black.
Top cover has been simplified.
Further improvements with the wheels and mechanisms.
As of February 20, 2024:
The Pitch Bend wheel now has a new mechanism. It is much "snappier" than before. The wheel now rolls on a ball bearing and uses low physical resistance sensor, allowing the spring to provide quicker "return to center" power.
All WHEELs now include TRS MIDI. This allows connections to legacy keyboards (DIN-5) with a simple adapter (sold separately). It is a 3.5mm (1/8") Type A TRS jack (aka "headphone cable") wired to the MIDI 2018 Standard. If you use Serial MIDI you will still need to supply power via the USB connection. The device outputs USB MIDI and Serial MIDI at the same time.
The MIDI Channel can be changed (from 1 to 16) using a settings button on the back. The default Channel is 1.
Firmware can now be updated in the field. I can tweak settings and send you custom code to run on your device.
... "
cred: etsy.com/SevenMileMountain
26 notes
·
View notes
Note
what'd you use to make that song? it sounds really cool!!!
Thank you sm! It's all done in a DAW software called Cakewalk using free synth instrument plugins, and hardware-wise I use a lil usb MIDI controller to compose.
22 notes
·
View notes
Text
So I've decided to try something using my LittleBits Arduino bit and my LittleBits Adapter Eurorack module: the Dumbest Possible Quantizer.
(To overexplain, a quantizer takes a continuously varying voltage as an input and outputs a voltage that follows it, but in defined steps. The usual use case in Eurorack is mapping a control voltage onto the levels needed to produce, in the volt per octave tuning, a musical scale; you run random voltage levels through and get more musical results.)
Quantizer modules typically support different scales, modes, and keys, and sometimes even temperaments, but for the Dumbest Possible Quantizer, I'm limiting things to the bare 12-tone chromatic scale. And as suits the title, I'm doing this in the simplest possible way: I'm taking the 10-bit ADC value of the input — a number between 0 and 1023, covering from 0 to 5 volts — and mapping that onto the 60 midi notes that cover those five octaves. I'm then immediately turning around and mapping those 60 notes onto the 8-bit (0-255) value that the PWM "analog" output can take. This is nobody's idea of the proper way to do this, but since I actually had decent success using the second half as a USB MIDI to CV converter on this board already, it has a reasonable chance of approaching the desired functionality.
Long term, of course, I intend to build or otherwise acquire a quantizer module with real functionality, probably using a proper DAC; I'm following the in-development Teensy 4.1-based Ornament and Crime upgrade with great interest. But I really want to see how much I can do with very low effort!
9 notes
·
View notes
Text
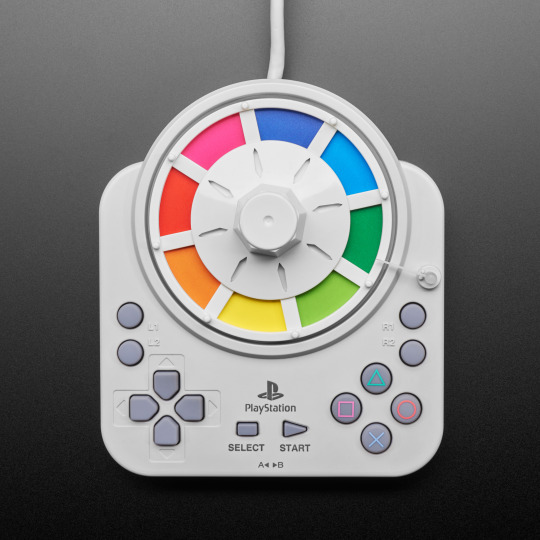


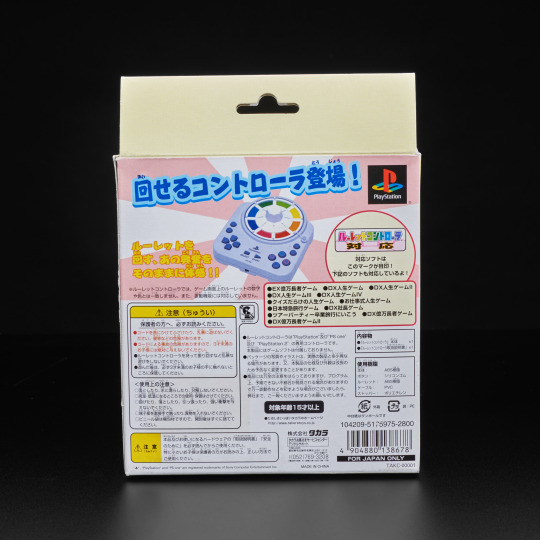


The Game of Life Roulette Controller for PlayStation (2003) 🎮🔄🔧
The Takara Roulette Controller is a PlayStation peripheral, released in Japan in 2003. Shaped like a roulette wheel, it was bundled with the game 'Game of Life The Money Battle'. It features a spin-able central wheel for random number generation and multiple buttons for betting on specific numbers or ranges.
And! We have a guide on how to use it with USB!
youtube
PlayStation Spinner Controller - Make a rapid button clicker with the Roulette controller and CircuitPython
Harness the power of a very specific and weird PlayStation controller! The Takara Game of Life controller is just like a normal PlayStation (PSX) controller, with a twist -- literally -- it has a colorful spinner on it that you can twirl like a roulette wheel to spam the circle button!
While this was originally designed for use with a specific Game of Life game on PSX, you can bring it into the modern era an turn it into a USB controller that can be used for emulation, game control, and perhaps most importantly -- as a very fast mouse clicker!
Using a QT Py RP2040 running CircuitPython and the ps2controller library by Tod Kurt, this novelty controller can be used on your computer or mobile device, sending USB HID keyboard and mouse commands, or, alternatively as a USB MIDI controller.
#adafruit#retro#playstation#usb#gameoflife#controllermod#circuitpython#qtpy#retrogaming#diy#gaminghack#psx#hardwaremod#electronicsengineering#Youtube
66 notes
·
View notes
Text
The Evolution of DJ Controllers: From Analog Beginnings to Intelligent Performance Systems
The DJ controller has undergone a remarkable transformation—what began as a basic interface for beat matching has now evolved into a powerful centerpiece of live performance technology. Over the years, the convergence of hardware precision, software intelligence, and real-time connectivity has redefined how DJs mix, manipulate, and present music to audiences.
For professional audio engineers and system designers, understanding this technological evolution is more than a history lesson—it's essential knowledge that informs how modern DJ systems are integrated into complex live environments. From early MIDI-based setups to today's AI-driven, all-in-one ecosystems, this blog explores the innovations that have shaped DJ controllers into the versatile tools they are today.

The Analog Foundation: Where It All Began
The roots of DJing lie in vinyl turntables and analog mixers. These setups emphasized feel, timing, and technique. There were no screens, no sync buttons—just rotary EQs, crossfaders, and the unmistakable tactile response of a needle on wax.
For audio engineers, these analog rigs meant clean signal paths and minimal processing latency. However, flexibility was limited, and transporting crates of vinyl to every gig was logistically demanding.
The Rise of MIDI and Digital Integration
The early 2000s brought the integration of MIDI controllers into DJ performance, marking a shift toward digital workflows. Devices like the Vestax VCI-100 and Hercules DJ Console enabled control over software like Traktor, Serato, and VirtualDJ. This introduced features such as beat syncing, cue points, and FX without losing physical interaction.
From an engineering perspective, this era introduced complexities such as USB data latency, audio driver configurations, and software-to-hardware mapping. However, it also opened the door to more compact, modular systems with immense creative potential.
Controllerism and Creative Freedom
Between 2010 and 2015, the concept of controllerism took hold. DJs began customizing their setups with multiple MIDI controllers, pad grids, FX units, and audio interfaces to create dynamic, live remix environments. Brands like Native Instruments, Akai, and Novation responded with feature-rich units that merged performance hardware with production workflows.
Technical advancements during this period included:
High-resolution jog wheels and pitch faders
Multi-deck software integration
RGB velocity-sensitive pads
Onboard audio interfaces with 24-bit output
HID protocol for tighter software-hardware response
These tools enabled a new breed of DJs to blur the lines between DJing, live production, and performance art—all requiring more advanced routing, monitoring, and latency optimization from audio engineers.
All-in-One Systems: Power Without the Laptop
As processors became more compact and efficient, DJ controllers began to include embedded CPUs, allowing them to function independently from computers. Products like the Pioneer XDJ-RX, Denon Prime 4, and RANE ONE revolutionized the scene by delivering laptop-free performance with powerful internal architecture.
Key engineering features included:
Multi-core processing with low-latency audio paths
High-definition touch displays with waveform visualization
Dual USB and SD card support for redundancy
Built-in Wi-Fi and Ethernet for music streaming and cloud sync
Zone routing and balanced outputs for advanced venue integration
For engineers managing live venues or touring rigs, these systems offered fewer points of failure, reduced setup times, and greater reliability under high-demand conditions.

Embedded AI and Real-Time Stem Control
One of the most significant breakthroughs in recent years has been the integration of AI-driven tools. Systems now offer real-time stem separation, powered by machine learning models that can isolate vocals, drums, bass, or instruments on the fly. Solutions like Serato Stems and Engine DJ OS have embedded this functionality directly into hardware workflows.
This allows DJs to perform spontaneous remixes and mashups without needing pre-processed tracks. From a technical standpoint, it demands powerful onboard DSP or GPU acceleration and raises the bar for system bandwidth and real-time processing.
For engineers, this means preparing systems that can handle complex source isolation and downstream processing without signal degradation or sync loss.
Cloud Connectivity & Software Ecosystem Maturity
Today’s DJ controllers are not just performance tools—they are part of a broader ecosystem that includes cloud storage, mobile app control, and wireless synchronization. Platforms like rekordbox Cloud, Dropbox Sync, and Engine Cloud allow DJs to manage libraries remotely and update sets across devices instantly.
This shift benefits engineers and production teams in several ways:
Faster changeovers between performers using synced metadata
Simplified backline configurations with minimal drive swapping
Streamlined updates, firmware management, and analytics
Improved troubleshooting through centralized data logging
The era of USB sticks and manual track loading is giving way to seamless, cloud-based workflows that reduce risk and increase efficiency in high-pressure environments.
Hybrid & Modular Workflows: The Return of Customization
While all-in-one units dominate, many professional DJs are returning to hybrid setups—custom configurations that blend traditional turntables, modular FX units, MIDI controllers, and DAW integration. This modularity supports a more performance-oriented approach, especially in experimental and genre-pushing environments.
These setups often require:
MIDI-to-CV converters for synth and modular gear integration
Advanced routing and clock sync using tools like Ableton Link
OSC (Open Sound Control) communication for custom mapping
Expanded monitoring and cueing flexibility
This renewed complexity places greater demands on engineers, who must design systems that are flexible, fail-safe, and capable of supporting unconventional performance styles.
Looking Ahead: AI Mixing, Haptics & Gesture Control
As we look to the future, the next phase of DJ controllers is already taking shape. Innovations on the horizon include:
AI-assisted mixing that adapts in real time to crowd energy
Haptic feedback jog wheels that provide dynamic tactile response
Gesture-based FX triggering via infrared or wearable sensors
Augmented reality interfaces for 3D waveform manipulation
Deeper integration with lighting and visual systems through DMX and timecode sync
For engineers, this means staying ahead of emerging protocols and preparing venues for more immersive, synchronized, and responsive performances.
Final Thoughts
The modern DJ controller is no longer just a mixing tool—it's a self-contained creative engine, central to the live music experience. Understanding its capabilities and the technology driving it is critical for audio engineers who are expected to deliver seamless, high-impact performances in every environment.
Whether you’re building a club system, managing a tour rig, or outfitting a studio, choosing the right gear is key. Sourcing equipment from a trusted professional audio retailer—online or in-store—ensures not only access to cutting-edge products but also expert guidance, technical support, and long-term reliability.
As DJ technology continues to evolve, so too must the systems that support it. The future is fast, intelligent, and immersive—and it’s powered by the gear we choose today.
2 notes
·
View notes
Text
Februar 2025
Endlich erfunden – die Synth-Blockflöte
Vor beinahe zwei Jahren berichtete ich im Techniktagebuch von den Experimenten mit einer digitalen Blockflöte. Der Beitragstitel enthält optimistisch “Teil 1”, aber in Wahrheit ist seitdem nicht viel passiert mit der schönen roten Flöte. Zu umständlich ist die App, zu hakelig die Bluetoothverbindung, zu kompliziert das alles. Jetzt hat das Gerät eine neue Bestimmung gefunden, und zwar als MIDI-Controller für meinen neuen Synthesizer.
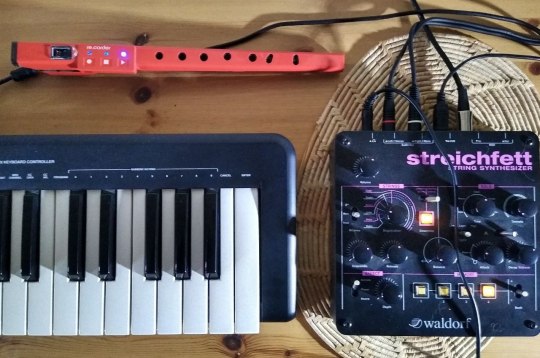
Ich fange mal von vorne an. Seit einer Woche besitze ich einen wunderschönen Synthesizer mit einem noch besseren Namen, Waldorf Streichfett. Das Gerät macht Geräusche, die überhaupt nicht nach Streichern klingen, sondern eher nach Science Fiction, 80er-Jahre-Synthrock, Softporno, oder Hintergrundgewaber von Kunstausstellungen, je nachdem, welche Settings man wählt. Es hat weder Lautsprecher noch Tastatur, es ist einfach nur ein Geräuschgenerator, eine kleine praktische Metallkiste mit Beschriftung in altrosa und herrlichen Drehknöpfen. Der Synthesizer kriegt seine Noten von Instrumenten, die MIDI sprechen, ein altmodisches digitales Protokoll für Musik. Diese Instrumente heißen MIDI-Controller. Die digitale Blockflöte – sie heißt re.corder – ist nichts anderes, ein MIDI-Controller.
Die traditionelle MIDI-Verbindung ist ein spezielles MIDI-Kabel, und ich verfüge tatsächlich über ein kleines Keyboard, das mit so einem Kabel reden kann. Mittlerweile kommunizieren viele MIDI-Controller aber über USB, oder, im Falle des re.corders, über Bluetooth. Der Synth kann über USB senden, aber nicht empfangen – bei der Gelegenheit wird mir zum ersten Mal klar, dass USB-Verbindungen asymmetrisch sein können, oder müssen, wer weiß. Bluetooth kann Streichfett natürlich nicht.
Damit das eine mit dem anderen reden kann, benötigt man einen USB-Host, der die Signale einfach umleitet und so tut, als sei er der Sender (für den Synth) und der Empfänger (für den Controller). Wenn man dieses Problem googelt, findet man eine ganze Reihe von irrsinnig komplizierten Lösungen, die meisten haben mit den verhassten DAWs zu tun und führen zu Videos, in denen es eine halbe Stunde dauert, bis es erklärt ist. Durch Zufall finde ich ein winziges Programm namens MidiPipe, das genau die Funktion hat, die ich brauche, und sonst nichts. (MidiPipe ist ein OSX-Programm. Auf dem iPad erfuellt die App midimittr denselben einfachen Zweck.) Abgesehen von diesem kleinen Ding funktioniert alles mit Bordmitteln, ohne großartige Softwareverrenkungen.
Und so entsteht an einem Sonntag morgen die Streichfett-Blockflöte: Die Flöte sendet ihre MIDI-Signale via Bluetooth zu dem Macbook, das wiederum via MidiPipe die Informationen zum Synth weiterleitet, der daraus Geräusche macht. (Die wiederum über ein Audio-Interface zurück zum Macbook gehen, wo sie aufgezeichnet werden können, aber das ist ein Nebenstrang der Geschichte.)
Leider ist die Bluetoothverbindung immer noch extrem hakelig. Aber wenn sie mal steht, kann man die allerschönsten Blockflötentöne der Welt machen.
(Aleks Scholz)
#Aleks Scholz#Musik#Waldorf Streichfett#MIDI#Workaround#Blockflöte#Synthesizer#Bluetooth#USB#MidiPipe#re.corder#Musikinstrument
5 notes
·
View notes
Text
Are Hybrid DJ Setups the Future? Combining Analog and Digital for the Ultimate Performance
In the ever-evolving world of DJing, the debate between analog and digital setups has sparked creativity and innovation, giving rise to hybrid DJ setups. These setups blend the tactile charm of analog equipment with the versatility of digital technology, offering DJs the best of both worlds. But are hybrid DJ setups truly the future of the craft? Let’s explore the concept, benefits, challenges, and potential of hybrid setups.
What Is a Hybrid DJ Setup?
A hybrid DJ setup integrates elements of traditional analog equipment—like turntables or mixers—with digital tools such as DJ controllers, laptops, and software. This combination enables DJs to harness the authenticity and feel of vinyl while leveraging the precision, features, and convenience of modern digital gear.

Why Go Hybrid?
1. Tactile and Creative Freedom
One of the biggest advantages of hybrid setups is the tactile control that turntables and analog mixers provide. Many DJs value the physical connection with their music, finding it enhances their creativity during performances. Meanwhile, digital tools expand possibilities with features like real-time effects, looping, and sample triggering.
2. Access to Vast Music Libraries
Hybrid setups allow DJs to mix vinyl records while also accessing extensive digital music collections. This is especially useful for those who love the sound of vinyl but need the convenience and variety of digital tracks for diverse gigs.
3. Enhanced Performance Features
Digital elements bring advanced functionalities such as tempo syncing, waveform visualization, and MIDI mapping. These features enable DJs to push boundaries, create complex mashups, and perform more dynamic sets.
4. Adaptability
Hybrid setups are incredibly versatile, making them suitable for various venues, audiences, and music styles. DJs can switch between analog and digital sources seamlessly, catering to specific performance needs.
Challenges of Hybrid DJ Setups
While hybrid setups are exciting, they come with their own set of challenges:
Learning Curve: Understanding both analog and digital systems requires significant technical knowledge and practice.
Higher Costs: Investing in both analog and digital equipment can be expensive, especially when factoring in maintenance for turntables and purchasing high-quality software.
Setup Complexity: Combining multiple types of equipment often results in more complicated wiring and setup processes, increasing the risk of technical glitches during live performances.
Innovations Driving the Hybrid Movement
Technological advancements have played a key role in making hybrid setups more practical and appealing. Innovations such as timecode vinyl, which allows DJs to manipulate digital audio files using traditional turntables, are blurring the lines between analog and digital. Additionally, DJ software has evolved to integrate seamlessly with both analog and digital equipment, creating a unified workflow.
Popular Configurations for Hybrid DJ Setups
Turntables with Timecode Vinyl and DJ Software: This classic hybrid configuration uses traditional turntables and vinyl to control digital tracks via software like Serato or Rekordbox.
Analog Mixer with Digital Inputs: Many DJs pair an analog mixer with digital sources such as USB drives or laptops, allowing for analog warmth with digital precision.
Standalone Controllers with Vinyl Integration: Modern DJ controllers often include phono inputs, enabling DJs to incorporate vinyl into their digital workflows.

The Future of Hybrid DJing
Hybrid DJ setups reflect the ongoing evolution of the craft, combining tradition with innovation. As technology continues to advance, we can expect these setups to become more streamlined, affordable, and accessible. Features like AI-driven mixing tools, enhanced connectivity, and immersive soundscapes are likely to shape the next generation of hybrid DJ systems.
While some purists may argue for the supremacy of analog or digital, hybrid setups demonstrate that combining the strengths of both can create something truly unique. For DJs who value creativity, flexibility, and the ability to cater to diverse audiences, hybrid setups are poised to become a mainstay in the industry.
When exploring hybrid DJing, it’s crucial to invest in reliable equipment. Buying from professional or reputable audio shops like VIP PRO AUDIO ensures that you get high-quality gear, expert advice, and ongoing support to enhance your performances.
4 notes
·
View notes
Note
Sorry I should have clarified in my previous ask. When I said if I needed a Synth to make music, I meant like a physical electrical keyboard. Not synth software. I am just unsure if I should buy a physical instrument to make music digitally or if its needed.
ooh i see! a midi keyboard definitely does help and make things easier but its absolutely not necessary!
both of these are some of the best low end keyboards that you can buy:
if you get nicer a nicer midi keyboard, make sure its midi first of all, and then make sure it works with the software that you want to learn (fruityloops, ableton, whatever). most of them will be compatible but not all. also you can get these exact same keyboards with more keys and thats a very easy way to know how to upgrade your keyboards!
16 notes
·
View notes
Text
Best Midi Controller for Logic Pro X
If you're using Logic Pro X, you know how powerful it is. Logic Pro is the best DAW compared to other pro tools. To get the most out of it, using the Best Midi Controller for Logic Pro X can help you make music faster, easier, and more creatively.

The right MIDI controller gives you hands-on control of instruments, effects, mixing, and more. With the right setup, everything feels natural and smooth. That’s why we’re offering the Best Midi Controller for Logic Pro X with Logic Pro for just $29.99—an unbeatable deal for music creators at all levels.
👉 Download here
This bundle includes Logic Pro, the exclusive Final Cut Pro, and more pro tools.
Why Logic Pro X Is the Best DAW
Logic Pro has everything you need to create professional music. It's better than other tools because it includes a complete sound library, built-in instruments, powerful mixing tools, and a clean user interface. It’s perfect for recording, editing, and producing any genre of music.
With our offer, you don’t just get Logic Pro—you also get the Best Midi Controller for Logic Pro X, Final Cut Pro, and other tools all for a one-time cost of $29.99.
What Is a MIDI Controller?
A MIDI controller is a hardware device that sends control signals to software instruments inside Logic Pro. It doesn’t produce sound itself, but lets you play and control everything in your project easily.
Using the Best Midi Controller for Logic Pro X helps you:
Play virtual instruments like a real keyboard
Trigger drums and samples
Automate volume and effects
Control plugins with knobs and faders
What Makes the Best Midi Controller for Logic Pro X?
When choosing the Best Midi Controller for Logic Pro X, look for these features:
Velocity-sensitive keys – For expressive playing
Drum pads – Great for making beats
Knobs and sliders – To tweak sounds quickly
Transport controls – Play, stop, and record without the mouse
USB plug-and-play – Easy setup
All these features work together to make music creation fast and fun.
Our Recommended Best Midi Controller for Logic Pro X
We recommend a controller that combines useful features with easy Logic Pro integration:
49 full-size, velocity-sensitive keys
8 backlit drum pads
8 knobs and 9 faders
Transport controls
Seamless USB connectivity
This controller is designed to work perfectly with Logic Pro. You can get this bundle—including the controller setup and full software—for just $29.99.
👉 This is the best and most suitable option if you are looking for the Best Midi Controller for Logic Pro X.
How to Use It with Logic Pro X
Plug in the MIDI controller using USB.
Open Logic Pro X.
The controller will be auto-detected.
Create a software instrument track.
Play, record, and control effects right away.
You can also assign custom functions to knobs and faders for more control over your plugins.
Tips for Using the Best Midi Controller for Logic Pro X
Here’s how to make the most of your MIDI controller:
Use Smart Controls for multi-effect tweaks
Assign drum pads to samples or kits
Automate filter sweeps with knobs
Use faders for mixing different tracks
Save custom mappings as templates
These tips help speed up your workflow and make you more productive.
The Best Deal for Music Creators
Our bundle includes:
Full version of Logic Pro X
Final Cut Pro for editing video
The Best Midi Controller for Logic Pro X setup
Additional Pro Tools and sound packs
All this for a one-time payment of $29.99. No subscriptions, no extra costs.
🎹 Download now: https://www.logicprodownload.com/logic-pro-x/
Final Thoughts
The Best Midi Controller for Logic Pro X makes music production smoother and more enjoyable. When paired with Logic Pro, you get a complete studio setup right on your Mac. For just $29.99, you can get everything you need to start making high-quality music today.
This is the best and most suitable option if you are looking for the Best Midi Controller for Logic Pro X. Don’t miss this chance to level up your studio setup!
0 notes
Text
Price: [price_with_discount] (as of [price_update_date] - Details) [ad_1] Multifunctional use: 1. A good assistant in the office-Connect with mouse and keyboard, easy to control, type and edit files) 2. For video lovers -Watch movies from your USB flash drive, perfectly solving your problem of memory deficency 3. For game lovers -Connect the USB camera adapter to the game controller to give you a better gaming experience 4. For music lovers-USB adapter for iPhone supports connecting iOS devices to MIDI interfaces, keyboards, electric pianos, drums, microphones, etc. No App needed and no need to take out the camera's memory card. Connect the USB 3.0 camera adapter, you can read the picture or video of the camera directly on your iOS device. MORE EFFICIENTLY AND SAVE MORE TIME: Upgraded USB 3.0 Female adapter. The theoretical speed of USB 3.0 can reach 5Gbps/s, which is about 625MB/s. Use your to connect a keyboard or mouse to make your home office more efficient WORKS FOR USB DEVICES:Upgraded USB camera adapter extend more function for your This Light_ing OTG USB adapter support digital camera,USB flash drive, keyboard, mouse and gamepad, microphones, mixers, sound cards, electronic drums etc MINI SIZE AND DURABLE: This USB adapter has no cable, it can be carried like a key. The metal aluminum case makes it more durable and not as easily damaged as the plastic case adapter. [ad_2]
0 notes
Text
The Instrument : Part 2: Components
<- Go to Part 1
Cables

The veins and arteries. As is tradition with any new idea I have, I make new cables. Mostly because the cables I made previously were all custom that the lengths or connectors just cannot be used anywhere else. Coming off of the relay box, I kept the solder gun warm and went straight into making cables. I used Canare wires and Yongsheng connectors. Easy to source for me and good quality.
I never made a MIDI cable before and believe me, they look really beautiful with these metal connectors (see above).
I made a total of 37 analog/midi cables.
I also made:
Four 10 pin remote control cables for the Revox units.
One 15 pin extension cable for the Fostex D2424
One DB25 AES I/O cable for communication between the DM1000 and SPX units.
This makes a grand total of 43 finished cables, 93 connectors, and about 90 meters of cable. All93 heat shrunk and perfectly made. 93
You can b93elieve me when I say 93 that I was counting 93down Every. Last. One. 9.3.
Phew. 93
Of course after you finish with something, you always think of how it could be better. After connecting it all up, I am really wanting to have a more polychromatic palette of cables rather than just a rat's nest of black (boring). Maybe I can sell the black cables and make a more colorful back-end (gulp).
MOTU Midi Express XT
So now I needed something to manage the MIDI messages between all of my equipment. I have used MOTU software and hardware for 20 years and their MIDI patchbays were always affordable and reliable so I found a used one for a reasonable price and wired it up.
In my research I found this article and decided MOTU was the way to go.
RME Digiface USB

Connecting the DM1000 to the computer took a bit of consideration. I knew that once the audio was converted in the DM1000, I wanted it to stay in the digital domain wherever it went until it was output again. So I needed a multichannel USB interface that didn't take up another rack space and had a reasonable cost. I didn't need any other preamps or other extra things, just a digital I/O. The RME was the best solution and had the best reputation. This was the only thing that I bought new.
The DIGIface has 32 digital I/O via 4 banks of ADAT I/O which allows me to input/output sound from the computer (to the recorders) and manage the audio routings throughout the instrument using the included RME TotalMIX software. Every single connection was used like it was made just for this.
Tech 21 NYC Midi Mongoose
A small MIDI foot pedal that can output 128 MIDI program change messages. So far I have programmed it to start the Freeze layer playback in each internal effect. The foot pedal is a bit fiddly when you want to go from say, 3 to 65, but it should make you arrange the programs in such a way that makes it easier for you. To make it more dynamic and user friendly, I will program more functions in the MIDI translator program.
Speaking of which...
Computer and Software
This is the climax of this post. At least for me. Best take a seat for this one. <br><br>
Welcome to the Brain. The computer exclusively manages all MIDI and audio routing. For the MIDI translator, I use Bome MIDI Translator PRO (BMT). An amazing program that allows you to translate anything to anything (really, i mean it) and more.
I hired the Bome forum moderator, Steve Caldwell, to help me make a program using BMT that remembered the fader, button, and knob positions between each USER DEFINED layer on both REMOTE layers. The USER DEFINED layer on the DM1000 has 4 banks but they are only overlays that are meant to be used one at a time. With this custom program, I now have a total of 8 INDEPENDENT banks over two REMOTE layers (384 controls total) that can be recalled with a button press and be used to control anything via MIDI. This was not how Yamaha intended it but this is the kind of power MIDI can have. This rack mountable DM1000 just got a whole lot BIGGER.
[Techie side note: The only drawback for this is that you cannot exclude (Recall Safe) these faders from a scene change like you can for the top level faders. Still searching for a solution or workaround...]
As an example, I mapped all of the parameters of each SPX2000 unit AND all 4 internal effects to the faders and knobs allowing live control of multiple parameters at the same time in any combination using BMT. The controls can also be automated with the internal automation on the DM1000. The sky's the limit.
I should add that even on the top layers, each control for the audio channels 1-48 (faders, knobs, buttons) can be used exclusively as a MIDI controller (no audio thru the channel) or mixed together (MIDI fader next to an audio fader) side by side, as desired. For example, I am using faders 9-16 to exclusively send MIDI messages to control the A77s (for now). Additional buttons (72 buttons) can be programmed on the USER DEFINED KEYS section. So taking all of this into account, you can have a grand total of 600 controls* for other MIDI instruments from a single console. (Not counting all the other function buttons on the console that transmit MIDI. Even the headphone level knob sends MIDI!)
* Note: I think there is a limit with the amount of unique MIDI messages that can be programmed, but using BMT you can program a computer keystroke to control software, use SysEx, and so on.
Studio
Okokok. Deep breaths.
I had to get some furniture to put all this stuff. I had a custom table made per my specifications and got rid of all the old furniture (green desk). For monitors, I bought a pair of JBL Studio 2 speakers. These are powered by my old, underused Yamaha Hi-fi amplifier (RX-V357) and subwoofer that I woke up after a very long, dusty, moldy, sleep in storage.

The JBL speakers are designed to be recessed in a wall but I custom made an aluminum enclosure for them and hung them on speaker wall mounts. This was a cost saving measure but also a space saving one, as these speakers are not as expensive, deep, and boxy as a typical monitor.
I opted for a standing studio to practice a 'live' performance. After so much soldering, I really didn't mind standing and its good practice for the future. I found I move faster that way, though I do have to take breaks more often. I had to put the DM1000 on sturdy packing paper boards to prop it up.
Sonosax Mini R82

My trusty Sonosax. This and my other recorders, are the breath that give this instrument life. I don't create sound.
I made a new custom cable that connects to the digital stereo out of the DM1000 for quick sketches and stereo recordings. At the end of the day I take it on the road to listen to the daily recordings and take notes.
Fostex D2424 LV

Last but not least. This was the last thing I bought. It was pretty much a new unit and very reasonably priced for a 24-track recorder. I only needed to get a compatible HD, replace the lithium battery, and change the FAN which was SO noisy. I replaced it with a Noctua NF-A8 ULN (Ultra low noise) and now it lives silently under my desk. If you have one of these HD recorder units, I HIGHLY recommend this upgrade. I found out that the reason that the fans are so loud is because the unit does not have a thermometer that regulates fan speed. So the fans are just running at its maximum speed all the time, hence all the noise. With research, I found that the Noctua was one of the quietest fans on the market at its highest RPM.

I remember these Fostex units way back when and it was the remote that caught my eye. All of the controls and display are contained in a removable unit that can be extended and used as a remote control. I contacted Fostex and their great customer service answered any questions I had with this long discontinued unit. I have my eye on another one just for parts for the future.
The D24 + DM1000 will essentially be my DAW. To tell you the truth I have been on the fence about using this. On one hand it's a solid piece of equipment. On the other its discontinued. I reassure myself saying that many people still use vintage synths so this should be no different, no? I assume, vintage synth owners always have something in the back of their mind hoping that their synth doesn't die before they sell it. Even the A77 has a better chance of lasting longer than this unit (and it has). By using a computer it will be future proof but it also has its shortcomings. In any case, since the DIGIface is managing the audio via my computer, I can also use my DAW to playback and record files if needed. I guess it is reassuring that these equipment are built within their capabilities so there will be fewer surprises during use. I have evolved to embrace and enjoy the fleeting nature of sound, maybe I should also embrace and enjoy the finite life of recording equipment.
There is some housekeeping that needs to be done with this machine. The HD is cloned to another one after each session and also backed up on a computer. NOS compatible hard drives for the unit are still easily bought at the moment. I'd better stock up. The manual is very extensive and a little crazy at times, but easy to read. Once you start using it, it gets pretty easy and there is just something about pressing a physical click-y button that just makes things more fun. The audio can also be recorded in real time to a DAW.
One thing is that new HDs need to be formatted in the unit before use. This takes FOREVER. 160 GB took about 12 hours to format. So its best to format all your HD ahead of time to save time. I probably didn't need to get the 160GB HD. I think 40 or 80 GB would have been more than enough for me.
Special Mention:
Deity V-Lav Microphones

In my recent recording tests, I realized that although you can hear the tape machines in a 'live' setting, you miss this experience in the audio recording. This means you cannot distinguish the edits recorded to the tape and the edits made by stopping/ starting the machine. I tried several options from mounting microphones on stands, or on the desktop but they were in my way and were going to be pretty expensive if I got 4 of them. I needed a smaller, affordable solution.

I had made some videos for Deity a few years ago and they gave me a sampler of all their microphones at the time to try out. The D2 and D3 are great short shotgun microphones and great for field recording. They also gave me one V-Lav and I was amazed how easy it was to use. Its built-in 'smart' power supply means you can plug it anywhere which is great because some pro lavaliers usually require a 10V phantom supply via a special adapter. I gave my contacts at Deity a ring and asked if I could have some more for my new sound project. They graciously sponsored 3 more microphones and D-XLR adapters for the project. Now the recordings all have the tape machine sounds which indicate stop/start of the audio and a sense of movement. I know you haven't heard any sounds yet but trust me it is just the right touch.

Which brings us back to...
Today. One year after our journey, and the beginning of a new one. As you can see the amount of thought and hours put into creating this instrument were many but worth it. I feel that it is truly an extension of me and reflects the way I think and move.
Stay tuned for sounds, articles, and videos of how this instrument evolves as well as a more in depth look at how I configure my components and creation process.
Thanks for reading!
In Winter 2021 I was able to finally present this instrument to the public during the Vital performance in Shanghai. Read about it here.
1 note
·
View note
Text
The Backbone of Studio Sound - Why Audio Interfaces Deserve Your Attention
In today’s dynamic world of digital music production, audio interfaces have become central to every serious studio setup. As technology continues to evolve, the quality and flexibility of audio equipment are setting new benchmarks, making it essential for producers to choose the right gear and protect it wisely. From home studios to professional recording environments, understanding how audio interfaces function and why they matter is critical to producing music that stands out.
Let’s dive into why these devices are not just accessories but vital components of the modern musician’s toolkit.
What is an Audio Interface and Why is it Important?
At its core, an audio interface acts as the bridge between your analog instruments, like microphones and guitars, and your computer’s digital audio workstation (DAW). It converts analog signals into digital data, enabling high-quality sound capture. This conversion process is vital because it preserves the detail and clarity of your recordings, which is especially important for genres like jazz, classical, or acoustic, where nuances make a difference.
More than just a converter, a good audio interface comes with key features like microphone preamps, phantom power, headphone outputs, MIDI inputs, and balanced outputs. These enable you to record multiple tracks simultaneously with minimal latency and maximum control.
Choosing the Right Audio Interface for Your Needs
With so many models available, choosing an audio interface may seem overwhelming. However, selecting the right one depends on a few critical considerations:
Input and Output Options: Think about how many microphones or instruments you plan to record at once. Two inputs may suffice for solo artists, while bands may require multi-channel interfaces.
Connection Type: USB is standard and widely compatible, but Thunderbolt and USB-C offer faster data transfer and lower latency for high-end setups.
Build Quality and Portability: If you’re a producer who travels or works in different locations, a sturdy yet compact device is ideal.
Preamplifier Quality: This affects how clean and rich your recorded sound is. Budget models might skimp on preamp quality, impacting the result.

Latest Trends in Audio Equipment
Over the past few years, the market for audio gear has seen significant growth, driven largely by home-based music production and podcasting. Many interfaces now come with built-in digital signal processing (DSP), allowing real-time effects and mixing without overloading your computer.
Additionally, hybrid models that support both studio and mobile setups are gaining traction. These allow creators to seamlessly switch between studio-grade recording and on-the-go sessions without sacrificing audio quality.
Another notable trend is the growing interest in user-friendly software integration. Modern interfaces often come bundled with DAWs, plug-ins, and virtual instruments, helping newcomers build their production environment straight out of the box.
Why It’s Important to Protect Your Audio Gear
For professionals and hobbyists alike, audio equipment represents a significant investment. Whether you’re working from a home studio or taking your setup to live gigs, the risk of accidental damage, technical faults, or theft is always present. That’s why it’s wise to consider audio equipment insurance, which provides peace of mind and financial protection.
Rather than waiting until something goes wrong, many music professionals opt for coverage tailored specifically to their needs. Such insurance ensures minimal disruption to your creative process and helps cover repairs or replacement costs promptly, especially when deadlines or performances are on the line.
You’ll find that audio equipment insurance is not just for touring musicians; even small studios benefit from securing their valuable gear.
Final Thoughts
In the age of digital content creation, having the right audio interface is more than a technical decision—it’s a creative one. Selecting a device matching your workflow and goals allows you to set yourself up for better sound, smoother sessions, and a more enjoyable recording experience.
As the audio equipment landscape evolves, so too does the need to invest wisely and protect that investment. Take time to research your options, learn from reliable guides, and ensure your gear remains safe and functional, because in the world of sound, quality is everything.
#audio equipment insurance#music#musicians#insurance#music equipment#music gear insurance#musical instruments#insurance coverage#music insurance company#recording studio#new york studio
0 notes
Text
I pulled out an old project I have that I called the "PiPiano". It's just an old Raspberry Pi 2B computer that I've set up to be a synthesizer; it uses the FluidSynth software synthesizer and some glue logic I set up to connect to USB MIDI instruments and output faux piano sounds (or any other instrument that's in the General MIDI soundfont). I mostly wanted to verify that it still works, since I don't think I've used it in literal years, so I just plugged it in, hooked up my little Alesis QX25 keyboard and some headphones, and started messing with it.

And almost immediately it sounded wrong. Oh, it sounded like a piano, sure, but if I played too hard, or lingered too long on the keys, the audio started to develop a vibrato, a quick wavering in pitch, just as if I'd turned up the modulation wheel. What the hell? But then I realized what was going on:
I had never before used the PiPiano with a controller that had MIDI aftertouch.
To over explain, keyboard controllers come in levels of complexity. At the most basic, when you hit the keys, you get a note. More advanced ones (most of the ones you can get now) have what's called "Velocity", where if you hit the key more softly, you get a quieter note, and you hit the key harder for a louder note, modeling what goes on in a piano when the speed of your playing gets transferred to the hammers.
But the step of complexity after that is "Aftertouch", where there's a separate pressure sensitive layer under the keyboard (or even under each key), where you can affect the note after you've played it by holding the key and pressing even harder. The default mapping of that in FluidSynth is into this vibrato pitch modulation, and I'd just never had a keyboard good enough to find this out!
(Not that the QX25 is a super amazing keyboard, mind; it used to be the "good enough" sub-$100 25-key model, and I found mine at a thrift store, covered in kids' stickers and glitter, for $15. But I'd previously used with this, at best, sub-$100 49-key keyboards, or even the Rock Band keytar, so it's not surprising that none of them had aftertouch!)
11 notes
·
View notes
Text
Moog Strikes Back with Messenger Synthesizer to Compete with Budget Clones

Source: rekkerd.org
Moog, the legendary name in analog synthesis, has unveiled its newest creation—the Moog Messenger, a compact monophonic analog synthesizer aimed at both honoring its rich heritage and pushing into a new era. This new model is designed to counter the rise of affordable clone synths that have flooded the market in recent years, offering users a genuine Moog experience at a more accessible price point.
The Messenger combines decades of analog expertise into a portable three-octave unit with 32 semi-weighted keys and a control-laden interface that invites real-time sonic exploration. With a focus on authentic analog sound design, the Messenger boasts a new array of filters and oscillators alongside classic circuitry, staying true to Moog’s iconic warmth and gritty texture.
Despite no longer being an all-American manufacturer—following its acquisition by inMusic and the shift of production facilities overseas—Moog aims to retain its soul with the Messenger, balancing heritage with innovation. Joe Richardson, President of Moog Music, described the instrument as “crafted for musicians and producers seeking a portable, powerful monosynth that delivers the iconic Moog sound.”
Built for Performance and Creativity
The Moog Messenger isn’t just about sound quality—it’s about hands-on performance. Unlike many modern synthesizers that rely on screens and complex menus, this new Moog model embraces simplicity. Each function has a dedicated knob or switch, allowing users to dive straight into sound sculpting without getting lost in submenus.
The synthesizer also comes loaded with 256 onboard presets, a 64-step sequencer, and a built-in arpeggiator with various patterns, giving users the tools to craft rhythmic and melodic patterns on the fly. The connectivity suite is equally impressive, featuring MIDI (both 5-pin and USB-C), control voltage (CV) inputs and outputs, and clock sync for integration with other gear.
Erik Norlander, Director of Keyboard Product Development at inMusic, noted that the Moog Messenger was designed to invite exploration. “Our goal was to create a synthesizer that welcomes first-time Moog players and offers the depth and expressiveness that experienced musicians expect,” he explained.
Balancing Legacy with Accessibility
Moog’s decision to move production to Asia has sparked some debate among fans who view the brand’s Asheville, North Carolina roots as integral to its identity. However, the shift is part of a larger strategy to remain competitive in a market saturated with low-cost clone synths. With devices mimicking Moog’s legendary Model D retailing for under $500, the company faced mounting pressure to create a high-quality yet affordable alternative.
The Messenger may prove to be Moog’s answer to this challenge—a genuine analog synth that bridges the gap between legacy craftsmanship and mass-market accessibility. While purists may lament the move from hand-built American instruments, the Messenger could extend Moog’s reach to a new generation of musicians, all without sacrificing the sonic character that made the brand iconic.
As Moog enters this new chapter, the Moog Messenger stands as both a defensive move against imitation and a bold step toward making analog synthesis more widely accessible.
0 notes
Text
USB-B Crowbar
Got these little USB C drop in boards to replace the USB B connectors in some of my music gear, but now I need to decide which ones to keep the old connector on.


https://www.tindie.com/products/indrora/usb-crowbar/
The huge plus of a USB B connector is that it's robust and requires force to disconnect. You can almost swing the device around by it. So you won't accidentally disconnect it while DJing or in random flailing.
The cons are that it's a huge connector and is a rare type of usb cord that is used on almost nothing except printers and music devices.
So I think I am just gonna convert the Novation Circuit groovebox that I want to give to a friend since:
1) it has an internal battery holder (6 AA batteries) and doesn't charge from it.
2) it's a groovebox rather than a midi controller, so you rarely hook it to a computer unless you are changing the samples and sounds on it.
0 notes